Friday, January 29, 2010

Montford Barn Siding

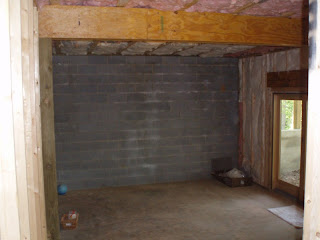
After we completed the Sliding door project, the homeowners showed us a problem in the back of their home. They have a superior wall foundation. However, to get the proper elevation the builder used a block stem wall. For some reason, the block wall continued to bubble and pop the paint. They were tired of looking at it and wanted to cover it up.


We decided to go with a barn style siding to go over our pressure treated furring strips. This beautiful white pine came from our friends at Warren Wilson College Forestry Program. Selectively harvested and local seemed to be the perfect fit for this project.

Here is and example of what it looked like. I have never seen this before. It looks like Efflorescence, but I think it has to do with the sealer used to seal the original block?

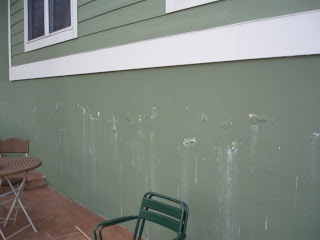
They had this sealed and painted a couple times with no luck.

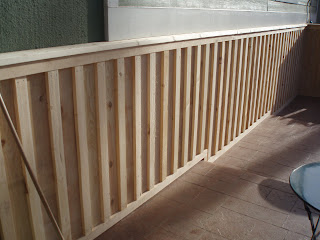
Here is a side view of our work.

Another angle.

The moisture content of the wood varied in the mid to high teens. After letting it dry for a couple weeks, we will go back and add a solid stain to give it a weatered barn look and protect the wood.

Here is the final product.

Read more...

Saturday, January 16, 2010

Woodruff Remodel

This full renovation in east Asheville was quite a project. The home was built in 1947 and is classic southern block and brick. Not a stitch of insulation in the walls or floors. We started out with a basic floor plan and no architectural drawings. The plan was to gut the place, add furring strips to allow for insulation, move the stairwell, finish the basement and build the deck. After we had done this, the homeowner decided to vault the ceiling. Engineered drawings were introduced at this point. We had to cut out the ridge and replace it, build custom trusses to carry the new load without ceiling joist. We also were able to get some specialty stair work and small hip roofs. Below are our best pictures of the project.


Above is the South Elevation
Here is our small hip roof to cover the basement door. Notice the solar hot water panel on the main roof!

This is the ceiling after the lathe and plaster were removed

Here are the custom LVL trusses we built to vault the ceiling Notice the over-sized hips as well. This was all built and installed from below without tearing off the roof.

East elevation before the deck. The AC unit had an exterior door opening for a future deck. That was in the 1940's. This is a happy deck.
Treated deck with composite decking and cedar handrail.

North side small hip roof to cover side door.
Jon working the router to cut a channel for our stair slats to fit into the post.
The slats were held without fasteners. We glued these spacer blocks above and below our slats.

Our white pine slat wall to allow window light to reach the basement and give a craftsmen look to the living room.


This is the slat wall at the bottom of the stairs in the basement

The picture is flipped, but this is what you would see to your left at the bottom of the stairs.

Read more...

Radiant Floor Installation

Jon Hoffman designed this Radiant floor system to be tied to a Takagi tankless water heater. Here is our underslab rough in.


More pictures to come as this project wraps up.

Read more...

Custom Interior Sliding Door

These folks in the Historic Montford neighborhood needed a way to close these two rooms off from each other. They toured an Ecobuilder Home where we had used a barn door track and a custom door and asked me to try to do the same with 3 doors.
This is the before shot.

These are birch doors with red oak trim.

This piece of art fits perfectly behind the glass.

This will be the typical set up.

Read more...

Custom Bookshelves

This is a custom bookshelf we designed. The customer has a house overflowing with books. He wanted to have a place to hold them as well as his tv and workout videos.

Here is the final product installed.


Read more...

Tankless Water Heater Install and Tile

Here is a laundry room/ mechanical room all stuffed into one. There was little room to move. The homeowner was looking to save some room and save money by upgrading to a Takagi tankless. While we were in here she decided to upgrade to a new tile floor as well.


Old vinyl floor.


New tile.
Wall mounted tankless


Read more...

Eco Panels- SIPS House

This new construction for Springtime Homes was built in West Asheville. It used SIP's rather than traditional framing. Structural Insulated Panels (SIPs) are studless walls built in a factory. The foam is the structure and allows for a high R-Value wall and a quick dry in time during construction. This house went from slab to titanium underlayment in about 10 days.


This is the morning we started.

This photo was taken around lunchtime.

We set the first floor walls in a day. That includes all the time spent to foam every joint you can possible foam.

To hold the roof panels, we used 4x12 douglass fir rafters. These guys weighed about 200 lbs a piece. It made for a few long, hot afternoons.

Roof panels.
Craning the panels in.

This passive solar design, has lots of glass on the south side.


The SIPs come with the siding already on the panel. Some batten strips gives it a board and batten style.


Read more...

Finished Basement

Here is an unfinished basement on a new log cabin. We insulated the block walls, hung sheetrock and tongue and groove ceilings and new light fixtures. These folks now have a recreation room to keep the kids at bay.


Read more...

Tomsky Master Bath/ Closet Remodel

This Master Bath and closet remodel took place in Biltmore Forest. The home was built in the 1950's I believe. Going from the master, you had to walk past an outdated small bathroom to get to an extremely large closet. We flipped the two rooms and customized the bath. Custom travertine tile and a custom vanity were the two big features. The shower has a steam unit and 6 body sprays, the floor has electric radiant heat, and the tub is heated.


Here is the old bath.


Here is the location of the new shower and vanity. We added insuation in this wall while we had it opened up.
Here is our custom vanity which we built onsite.


The new toilet location

Inside the shower. We custom cut about 300 tiles for this shower.

Here is the tub

Entry to the shower.

Here is the new closet

Read more...

  © Free Blogger Templates Blogger Theme II by Ourblogtemplates.com 2008

Back to TOP