Tuesday, December 14, 2010

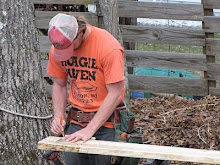
Weatherization Project

Although we started doing weatherization projects last winter, this job allowed me the proper time to take pictures of what is typically done. For the most part it is all about sealing penetrations that let heat out or cool air in.
Here is a sealed crawlspace. It has 10 millimeter plastic laid down over the dirt in the crawlspace. The plastic is run up the walls and mastic seals it to the block. We wrapped the columns as well and notice we sealed all the duct work in the crawl. The leaky duct work can pull dust and mold from a typical crawlspace into the house. Not here though.

Here we foam and seal the foundation vents to make this a fully sealed crawlspace.

Attic hatches are typically uninsulated and very leaky. In the winter the homeowner could feel cold air falling out of the attic here. The pull down stairs made this tricky, so I built a rigid foam hatch at the top of the stairs.

Can lights are extremely leaky. Some houses can have up to 30 cans in the ceiling. Here we pull down the trim, silicon around the fixture, then seal the trim to the ceiling.


Another typical problem are attic knee walls. Anytime you have fiberglass insulation with no backing, the insulation cannot perform properly. The inside of the room has sheetrock backing, but the cold air in the attic washes right through this insulation. One fix is to use a reflective bubble wrap to back the insulation.
Here we used one inch rigid foam for additional R-value. After the boards are installed, we foam all the seams and gaps.


Read more...

Adair's Construction Network Deltec Finish

We started this project in June and had the homeowners in the first week in December. The timing could have not been any better. This has been the coldest early December on record and at their elevation and high wind area it would have been brutal in the camper.

Here are some tile finish details. Not our work, but nice nonetheless.

Master shower above.


Guest shower

Here is a custom built-in storage unit. This has four doors to allow for total privacy.

Here is a shot of the fireplace. The tile guy also did the stone work.

Here is a side view of my black walnut mantle.

Rough sawn black walnut before it was milled and planed.

Cork flooring in the kitchen. The rest of the house was bamboo.

A view of the kitchen from over by the fireplace

This is the view from the kitchen sliding door. Nice spot for morning coffee!

Tongue and Groove ceiling in the vaulted half of the house.

Kitchen area during cabinet installation.

Kitchen area after insulation.


Read more...

Thursday, October 14, 2010

Waynesville Deck

This was a back deck built for some friends of ours. It is about 555sqft and is framed to handle a future hot tub. We also built a privacy wall and included an outdoor shower.

This is the view of the back of the house from the yard.


Roughly the same view after the deck was built.

A view of the custom gate and railing looking out onto the back yard.

Stairs going down to the new dog run area. They have a small, older dog who has trouble with stairs, so we made these stairs less steep than a typical set of stairs.
A view of the privacy wall and outside shower.

Read more...

Saturday, September 25, 2010

Adairs Construction Network
This is our up to date progress. Roof on and exterior doors in. The insulators and drywallers will have at it for the next few weeks.

Read more...

Castel Renovation

After the Castel's moved into the house, Dave realized that the custom butcher block island did not have enough elbow room. We decided to build a new larger top with metal brackets. I put the first butcher block top on his desk and moved his custom cherry desk top to the laundry room as a clothes folding table.


Local wormy maple with a cherry inlay. Just over 2" thick.

Read more...

Tuesday, July 6, 2010

Adairs Construction Network

This Deltec Home is a custom home by Adair's Construction Network. This has been a great crew and a beautiful homesite at approximately 3,700 feet in elevation. Scroll to the bottom and work your way up to see our progress. This job started in June and should be complete for move in by November.

High efficient water heater/ boiler.

Radient tubing for the hydronic heating.


Setting the bands for the decks


Here is the covered front porch. This adds great porch space and really helps with the overall look of the house.


A view inside once the center post was removed. The house is engineered to hold itself up and its shape makes it ideal for high wind areas like this.

Cut out for the front porch wing

All the hips in. This is 2 days of progress from setting walls.


Here we are setting the hip trusses.

These panels came pre-sided and with windows installed

Here is a great view while we were setting the wall panels. The walls are 8 foot and the larger the floorplan the more panels you need. This is a 17 sided plan.


This is how the job progressed before I started. Superior wall daylight basement and the main level trusses were in.

Read more...

Castel Renovation

This job was in North Asheville's Beaverdam Neighborhood. We added a third deck off of the master, installed underdeck to create dry space on the lower two decks, new tile and tub in master bath, crown on the main level, radiant floor heat with new bamboo in the art studio, caulk and paint inside and out and weatherization upfits in the attic. 95% of the work was completed via email and phone conversations with the homeowners from Tampa Fla. What great folks!


A view of the underdeck. What a great looking finished product.
A view of the new 3rd story deck. This was engineered and stacked ontop of and existing double deck.


A view of the deck band during framing.


A view of the caulk joints on the siding. When we attached the deck, it was observed that the house did not have a drainage plane (tyvex) behind the siding. To help protect the house, we had every siding joint caulked before the house was completely re- painted.

Here is a shot of the finished soaking tub with custom shelf. We added the shelf to keep our new water lines out of the exterior wall. Looks great and functions well.
A side view of the electric radiant floor mats going under the new tile floor.
The original master bath, with the corner jaguzzi tub.


Here is a custom butcher block island. This is made from local wormy maple with a cherry inlay. Dave the homeowner has quite the chef's kitchen and this not only looks nice but is used multiple time a day. Stay tuned for an updated larger top to allow him more room to cut and dice!

Here is a view of the lumber right off the truck from the mill. Rough sawn and kiln dried.

Here is a look at the finished bamboo floor in the downstairs art studio.

Here is some foam air sealing around the edge of our rigid foam. This insulation prevents the heat from the radiant floor from being pulled into the slab below.
Here is our tubing with pressure treated sleepers.

A shot of the kitchen during painting.

A shot of the dirty laundry room. The folks that sold the house, did not clean up very well when they moved out. We went right over this stained flooring with new linoleum.


Read more...

  © Free Blogger Templates Blogger Theme II by Ourblogtemplates.com 2008

Back to TOP