Thursday, April 22, 2010

Dual flush conversion

I have been looking forward to having a dual flush toilet for awhile now. They can be a bit spendy and not worth ditching a perfectly good toilet for. Now you can have the best of both worlds with a dual flush conversion kit that only take 15 minutes to install and set. Here is the exciting inner workings of a standard toilet.
Here is a standard single flusher.
This Dual Flush adapter re-places the standard flapper. Not only will you "never" need to deal with an old flapper again, the cylinder allows you to control the amount of water that is used in the back of the tank.
Here is the new flusher. A small button above that flushes for number 1 and a larger button below for number two. When you push number one, about 2/3 pf the water in the tank remains in the tank. The product claims to save $100 year and cost only $27 online.


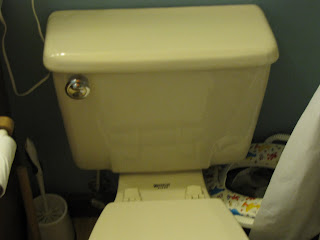
Maybe next, a composting toilet?
Happy Earthday!


Read more...

Thursday, March 11, 2010

Montford Handrail to front door

The folks who had us do the slidings doors and then the barn siding on the back of there home had another project for us. They wanted a hand rail to help them down the front stairs to there house.


Here is the before shot without a hand rail

This is where the car in the previous picture was parked.

A view from the front of the house.


Read more...

Custom Coffee Table

Here is coffee table that I made from recycled, local white pine and an off cut of ipe. The frame was ripped from a leftover 2x8x10 framing member. Total cost $0. Nice.


Read more...

Friday, January 29, 2010

Montford Barn Siding

After we completed the Sliding door project, the homeowners showed us a problem in the back of their home. They have a superior wall foundation. However, to get the proper elevation the builder used a block stem wall. For some reason, the block wall continued to bubble and pop the paint. They were tired of looking at it and wanted to cover it up.


We decided to go with a barn style siding to go over our pressure treated furring strips. This beautiful white pine came from our friends at Warren Wilson College Forestry Program. Selectively harvested and local seemed to be the perfect fit for this project.

Here is and example of what it looked like. I have never seen this before. It looks like Efflorescence, but I think it has to do with the sealer used to seal the original block?
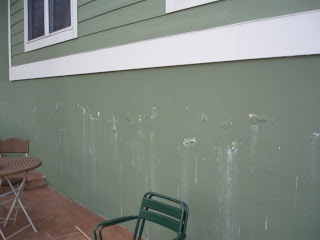
They had this sealed and painted a couple times with no luck.

Here is a side view of our work.

Another angle.

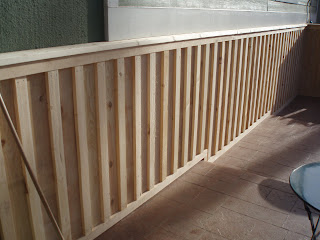
The moisture content of the wood varied in the mid to high teens. After letting it dry for a couple weeks, we will go back and add a solid stain to give it a weatered barn look and protect the wood.

Here is the final product.

Read more...

Saturday, January 16, 2010

Woodruff Remodel

This full renovation in east Asheville was quite a project. The home was built in 1947 and is classic southern block and brick. Not a stitch of insulation in the walls or floors. We started out with a basic floor plan and no architectural drawings. The plan was to gut the place, add furring strips to allow for insulation, move the stairwell, finish the basement and build the deck. After we had done this, the homeowner decided to vault the ceiling. Engineered drawings were introduced at this point. We had to cut out the ridge and replace it, build custom trusses to carry the new load without ceiling joist. We also were able to get some specialty stair work and small hip roofs. Below are our best pictures of the project.


Above is the South Elevation
Here is our small hip roof to cover the basement door. Notice the solar hot water panel on the main roof!

This is the ceiling after the lathe and plaster were removed

Here are the custom LVL trusses we built to vault the ceiling Notice the over-sized hips as well. This was all built and installed from below without tearing off the roof.

East elevation before the deck. The AC unit had an exterior door opening for a future deck. That was in the 1940's. This is a happy deck.
Treated deck with composite decking and cedar handrail.

North side small hip roof to cover side door.
Jon working the router to cut a channel for our stair slats to fit into the post.
The slats were held without fasteners. We glued these spacer blocks above and below our slats.

Our white pine slat wall to allow window light to reach the basement and give a craftsmen look to the living room.


This is the slat wall at the bottom of the stairs in the basement

The picture is flipped, but this is what you would see to your left at the bottom of the stairs.

Read more...

Radiant Floor Installation

Jon Hoffman designed this Radiant floor system to be tied to a Takagi tankless water heater. Here is our underslab rough in.


More pictures to come as this project wraps up.

Read more...

Custom Interior Sliding Door

These folks in the Historic Montford neighborhood needed a way to close these two rooms off from each other. They toured an Ecobuilder Home where we had used a barn door track and a custom door and asked me to try to do the same with 3 doors.
This is the before shot.

These are birch doors with red oak trim.

This piece of art fits perfectly behind the glass.

This will be the typical set up.

Read more...

  © Free Blogger Templates Blogger Theme II by Ourblogtemplates.com 2008

Back to TOP